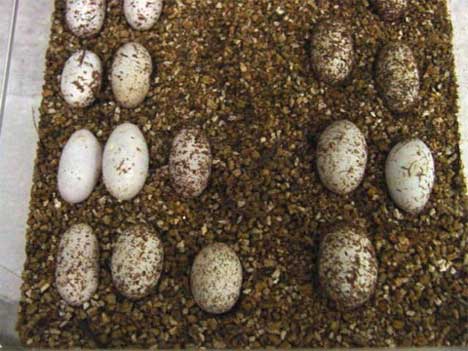
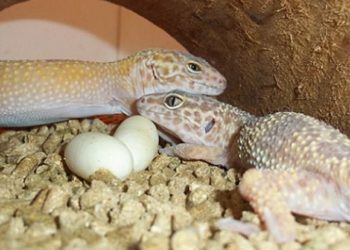
Are you among those owners who do not want to spend the extra sum of money on the incubators and still want to provide the same surrounding as like it? Well, you can know how to create one in some easy steps from the content that is provided below.
You can possibly create your own incubator and save the extra money but some owners do not do it perfectly and they might lose the eggs. Also, we know that no one among us wants to endanger the eggs so we have provided the guide below that will help the users o incubate their eggs without making use of the incubator.
Contents
What do you need to make an incubator?
Making an incubator at home is an easy task but it needs practice. For this, you will need a container where you can keep the eggs, and there you need to maintain the temperature as well as the humidity for around 35-90 days.
A container so that you can keep the eggs:
- The plastic storage container is a great option and keeps the eggs in a box that has a lid. You need to make sure that there are sufficient holes in the top so that the air can easily pass through.
- The container needs to be 3-4 inches deep. A heat lamp is also required for the eggs.
The medium:
- You need medium or egg bedding so that the moisture can be retained.
- The most common choices for this could be vermiculite and peat moss.
- Spread this in the container evenly and even over the eggs partially.
Water dish:
- You need a water dish and spray bottle that is necessary for the eggs. This will help the humidity to be high and the most common option that you can use is the water bottle.
- If you spray a number of times a day then the air will remain humid and along with that the moisture also stays.
- Moreover, some owners even place the water dish in the container itself and this allows the heat to disperse.
- The most commonly used method is the spray bottle.
Meters:
When you are working with the incubators that are pre-made you won’t have to deal with the humidity and temperature as it is already set.
Without these ones, you can use the good thermometers or the hygrometers that are combined with each other. To get the most accurate reading you can place the container near the eggs. Even if you take proper care and maintain the air and humidity, still mold growth is seen outside the eggs.
Steps for incubating the eggs without an incubator:
Step 1
Fill several plastic food storage containers halfway with vermiculite. A single female gecko can be served adequately with a single container, but having backups is always a good idea.
Step 2
Weigh the vermiculite with food or postal scale and add an equal amount of nonchlorinated water, by weight, to the vermiculite by spraying it on top of the vermiculite with a spray bottle.
Step 3
Choose a container to turn into an incubator based on the number of eggs you will be caring for. The more eggs you have, the bigger container you will need, but bigger containers will cost more to heat. Small Styrofoam coolers can be used for small colonies, while large operations may require you to repurpose an old refrigerator or icebox.
Step 4
Prepare a heating element, a heat rock, heating tape, or another similar heat source for your incubator. The size and output will depend on the size of the container and will, in any case, require trial, error, and calibration. In flat incubators like coolers, secure the heat source to the bottom of the container. Drill a hole or use an available drainage port to feed the power wire out of the incubator.
Step 5
Place a sheet of egg crate light diffuser over the heating element. Cut cardboard tubes to support the egg crate and keep it from directly touching the heat source.
Step 6
Remove interior squares of the egg crate with pliers to create a spot for a small electric fan to sit. Make sure the fan is close to the heat source and orient it so it sucks air from the heat source and dispenses it upward and outwards into the incubator. Feed the power cable from the fan out through the same hole as before.
Step 7
Place an electronic thermometer into the incubator. Set it so that it remembers maximum and minimum temperatures.
Step 8
Plugin your heat source and fan, close your incubator, and let the entire system come to temperature. Check the thermometer often to see what temperatures it has been reading. Adjust the heating elements until the incubator can consistently read 90 degrees or above.
The temperature controller can turn off the heat to make the temperature drop, but it can’t turn up the heat any more than the “on” setting for the device you’re using. Move the thermometer probe around to make sure that the entire incubator is reaching the same temperature and adjust the fan if it isn’t.
Step 9
Plug a non surge power strip into the wall and plug an incubation temperature controller into the strip. Feed the controller’s temperature probe into the incubator and place it at a point where your eggs will be incubating, on top of the egg crate. Unplug your heat element from the wall and plug it into the appropriate port on the temperature controller.
Step 10
Follow the manufacturer’s directions for calibrating your temperature controller. Set the controller to 82 degrees Fahrenheit to produce mostly females. Choose 90 degrees for most males. A temperature of 86 to 87 will produce a mix of males and females.
Set temperature alarms, if available, to 74 degrees on the low side and 95 degrees on the high side. Temperatures outside of this range can be lethal for eggs and many temperature controllers have audible alarms that can alert you to a critical failure in heating.
Step 11
Make a mark on top of the eggs, when your female lays them, with a permanent marker. Rotating eggs can kill them, so making this mark will help you keep the eggs at the correct orientation while moving them.
Step 12
Dig small indentations in the vermiculite for each egg. Place the eggs into these indentations gently and shore them up so they don’t move around.
Step 13
Seal the lids to these containers and place them into the incubator. Open the containers weekly to check on the eggs and ventilate the containers. Reapply water, as necessary, to keep the vermiculite moist. If any eggs show signs of mold, decay, or discoloration, remove them and place them into separate containers — they may still be viable but shouldn’t be given the chance to contaminate other eggs.
More:


